Happy New Year everyone!! Anyone else feel like this year flew by? I seriously do. It went by so incredibly fast. I have been thinking for the past few weeks, and I realized that I want to do two things this year: one, start journaling more, and two, start taking more pictures.
Now, I am going to expand on numero uno for a little while. I will start off by saying that I am by no means a journaling type. I remember as a child I always wanted a new journal. All of my cool friends and the girls on my favorite TV shows had journals that they wrote in every day, and I wanted to be exactly like them.
So, I would go out and buy a sparkly journal (Hello, Lisa Frank) and then write for maybe a day or two. The entries would go something along the lines of, "Dear Journal, my brother picked on me today and my mom bought me some Polly Pockets. Love, Melissa" After writing different variations of this for a few days, I would set the journal down somewhere and never pick it up again. Ever. I can recall doing this about 10 different times. I was an odd child.
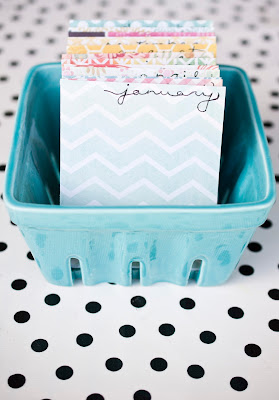
Anyhoo, because I am obviously not the best at sticking with little tasks like this, I am going to make it easier on myself with a little DIY craft. I call this (...drumroll please...) the Calendar Journal!
This little guy is awesome because, for one, it looks cute, but it also allows you to document your life with just a few words a day. This journal has a card for every day of the year, and you basically write down something memorable that happened to you each day, whether it be good, bad, or just normal. I love this because you keep doing this year after year, and as you continue through the journal for the second, third, and fourth time you can look back on what happened to you each day in the preceding years. Awesome, right?!
So, here is what you need to make this little dude:
First off, you need to cut the 4x6 cards in half in order to get a bunch of 4x3 cards. Basically cut up all of one set of 100 cards, and then pull out 17 from the second and cut up the remainder. This will get you 366 smaller cards. I used a paper cutter for this because I had one lying around and it makes it go a little faster. Scissors will work fine, though. You are going to be putting these sheets in the berry basket, which you can find at Anthropologie.
Next, take your colored paper and cut out twelve 3 by 4.25 cards to use for the month markers.
Once you are done cutting out your markers, count out sheets for the number of days in each month and place the markers at the front, like so.
Next, you are going to stamp the dates on the lined cards. This part takes a little while but just keep pushing through! If you aren't a perfectionist like me you can just write the dates on - this will go a lot quicker.
After you are done with this, all you need to do is write the months on the colored cards and you are finished!

This is what the finished calendar should look like. Cute, right? :)
Hope you all had a wonderful new year!
P.S. To expand on number 2 from the beginning of this post, I am starting a Project 365. To learn more about what this is and see the pictures I am posting, click here


